
Updating an Existing Data Pipeline via Reactor Data Sandbox Testing
Mappings: Advanced Tutorials · Updated July 24, 2025
Introduction
The Reactor Data Mapping Sandbox provides a safe and isolated environment to test changes to your data pipelines before deploying them to production. This guide walks you through the process of updating an existing data pipeline using Sandbox testing.
Demonstration Video
Below is a video demonstrating this process. Read on for a high-level workflow and detailed summary of the process followed.
High-Level Workflow
- Open and save production model configurations to the Sandbox.
- Create a Sandbox target for your test pipeline.
- Deploy your Sandbox output.
- Run a mapper replay against the Sandbox pipeline.
- Validate your changes in the destination and iterate as needed.
- Deploy updated models from the Sandbox to Production.
- Run a mapper replay against the new Production pipeline.
Step-By-Step Guide
1. Open and Save Production Model Configurations to the Sandbox
To begin, you'll need to load the production configurations of the models you intend to edit into the Sandbox.
- Navigate to the Mappings screen in Reactor (Related article: Navigating Reactor)
-
In the Production Mapping environment, click on a model in the pipeline you intend to edit (Related article: Navigating the Mappings Canvas). Start from the leftmost model in your pipeline.
-
Save the model configuration. This action automatically loads the model configuration into your Sandbox environment.
- Repeat this process for all models in the pipeline you wish to edit. To ensure all relevant models are loaded into the Sandbox for comprehensive testing, move the Sandbox<>Production model to Sandbox.
2. Create a Sandbox Target for Your Test Pipeline
Next, you must define a destination for your Sandbox pipeline's output (Related Article: Connect Reactor To Your Data Destination and Define Destination Targets).
-
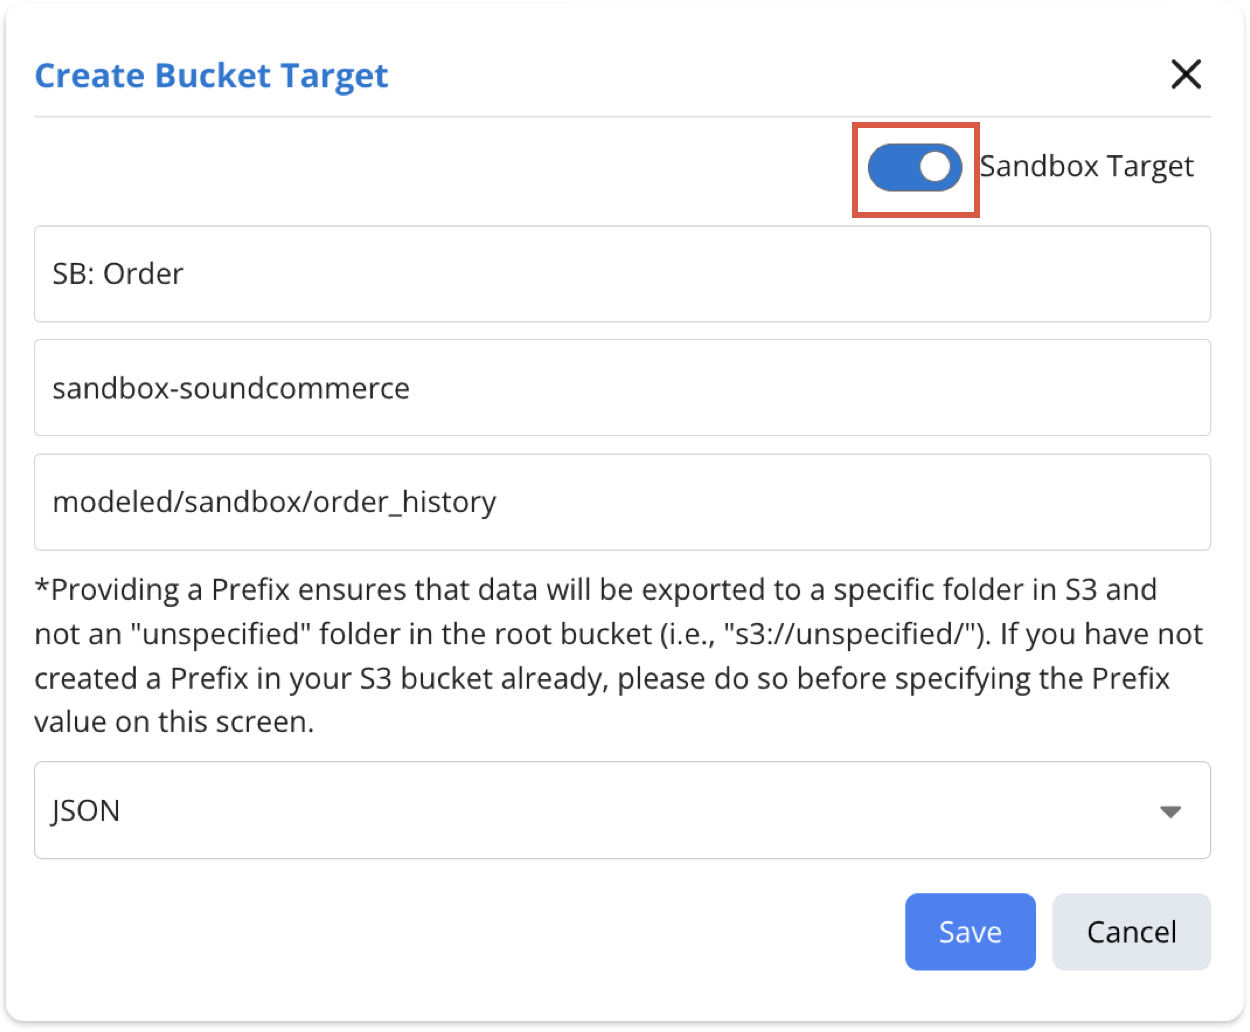
If exporting to an S3 Bucket: Simply create a sandbox bucket target on the Destinations page within Reactor Data. Select the Sandbox Target toggle to ensure that the target can be deployed as an output in the Mappings Sandbox.
-
If exporting to BigQuery (BQ) or Snowflake (SF):
- Create a landing table in your data warehouse. The easiest method is to copy the schema from your existing production table using your warehouse's native functionality.
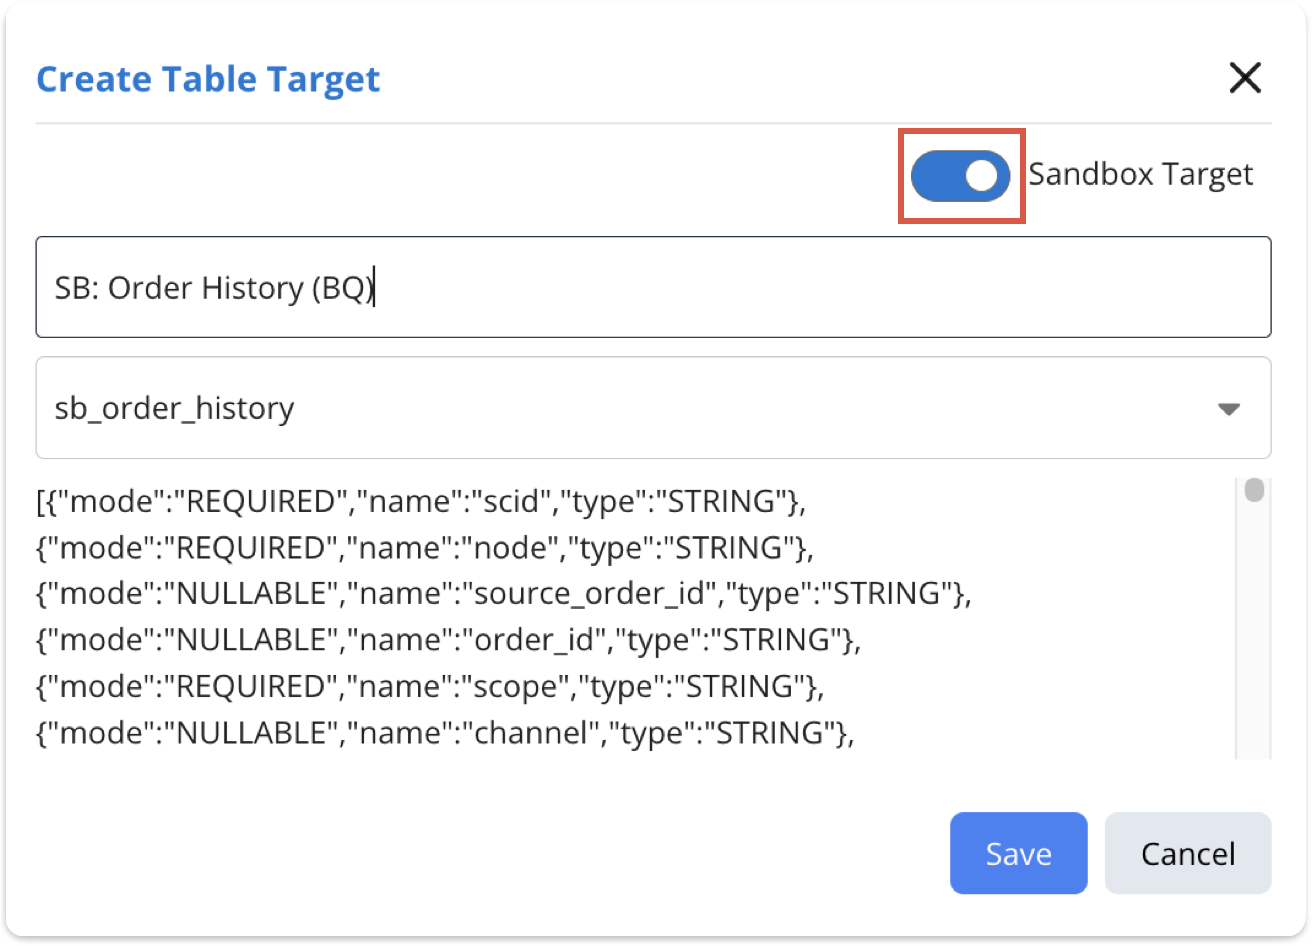
- In Reactor, navigate to the Destinations page, select the destination associated with your data warehouse, and create a sandbox table target for the new table you just created. Select the Sandbox Target toggle to ensure that the target can be deployed as an output in the Mappings Sandbox.
3. Add a Sandbox Output to your Sandbox Target
Once your models are loaded into the Mappings Sandbox and your sandbox target is configured, navigate back to the Mappings Sandbox and add an output that points to your sandbox target. Don't forget to save your output!
4. Run a Mapper Replay Against the Sandbox Pipeline
Execute a mapper replay using your Sandbox pipeline to process data with your proposed changes (Related Article: Retransforming Data and Mapper Replay).
5. Validate in Your Destination and Iterate as Needed
After the mapper replay completes, thoroughly validate the output in your designated Sandbox destination.
- Check for data accuracy, completeness, and adherence to your updated mappings.
- If adjustments are needed, update your mappings within the Sandbox and run another mapper replay. Repeat this validation and iteration process until the output meets your requirements.
6. Deploy Edited Models to Production
Once you are satisfied with the results in the Sandbox, you can promote your changes to the production environment (Related Article: Building, Updating, and Testing Mappings in Sandbox Mode).
- In the Mappings Sandbox, select the right-most model from the pipeline, then select the Deploy to Production button in the Model Configuration Editor. Your browser tab will refresh. This action pushes your validated changes to Production and removes the saved model from the Mappings Sandbox.
- Repeat this action for every other model in the pipeline that you edited during this process to ensure all your changes are deployed to production.
-
Optional: If there are models in your Sandbox pipeline that you did not edit, you can simply delete those models from Sandbox in lieu of deploying them to Production.
7. Run a Mapper Replay Against the New Production Pipeline
Finally, run a mapper replay against your newly updated Production pipeline to ensure the changes are live and functioning as expected in your production environment (Related Article: Retransforming Data and Mapper Replay).