
Define Your Data Source's Identifiers
Sources · Updated August 12, 2025
Introduction
This document details the process of configuring an Identity Setup for any data source connected to Reactor Data. After connecting to a data source and initiating data ingestion, defining the source's identity setup is the next step needed to prepare data for mapping. This document outlines this processes and explains their importance of setting primary and secondary identifiers for your data sources.
What is an Identity Setup?
An Identity Setup is a configuration that instructs Reactor on how to index incoming source data before any transformations are applied. It serves to:
- Specify Primary Identifiers: Define which field or combination of fields can uniquely identify records in the data. These are designated as "primary identifiers."
- Define Secondary Identifiers: Identify non-primary identifiers that can be used in Source Link configurations to join data from two different sources. (For more information on Source Links, refer to the "How To Link Sources in Reactor" documentation.)
How to Configure an Identity Setup
To configure a source's Identity Setup, follow these steps:
-
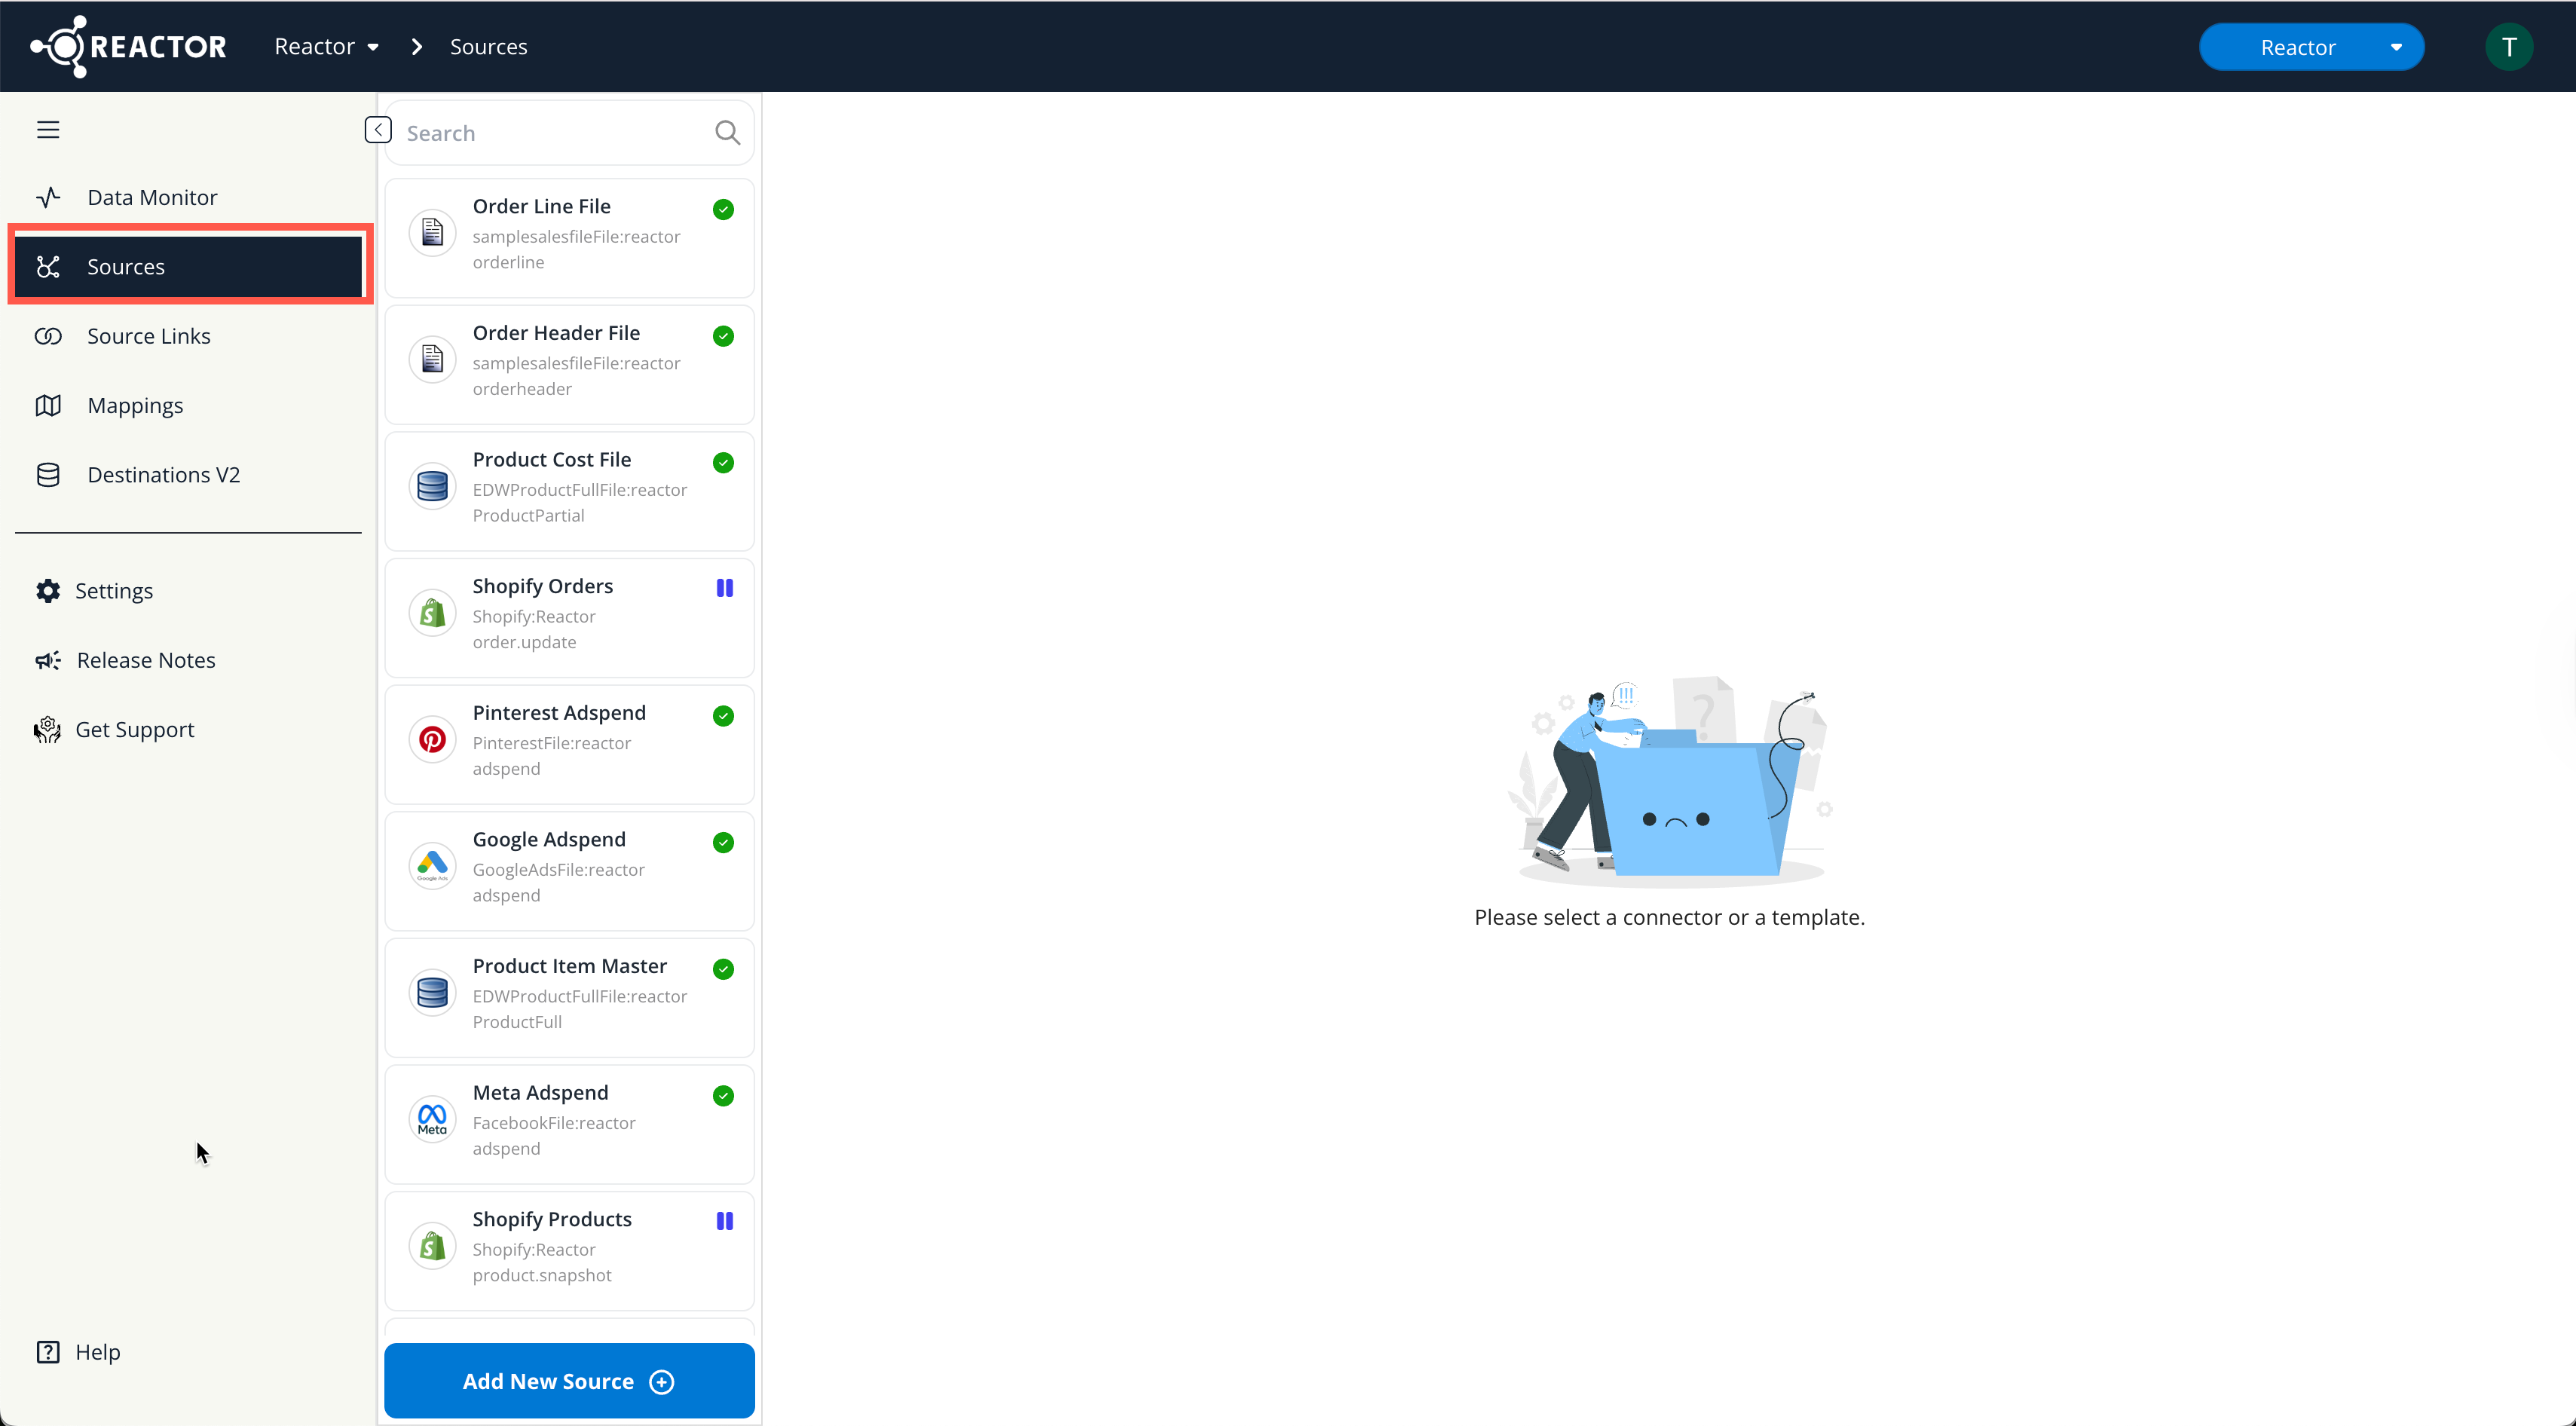
Navigate to the Sources Panel:
- In Reactor, use the left sidebar to select Sources.
-
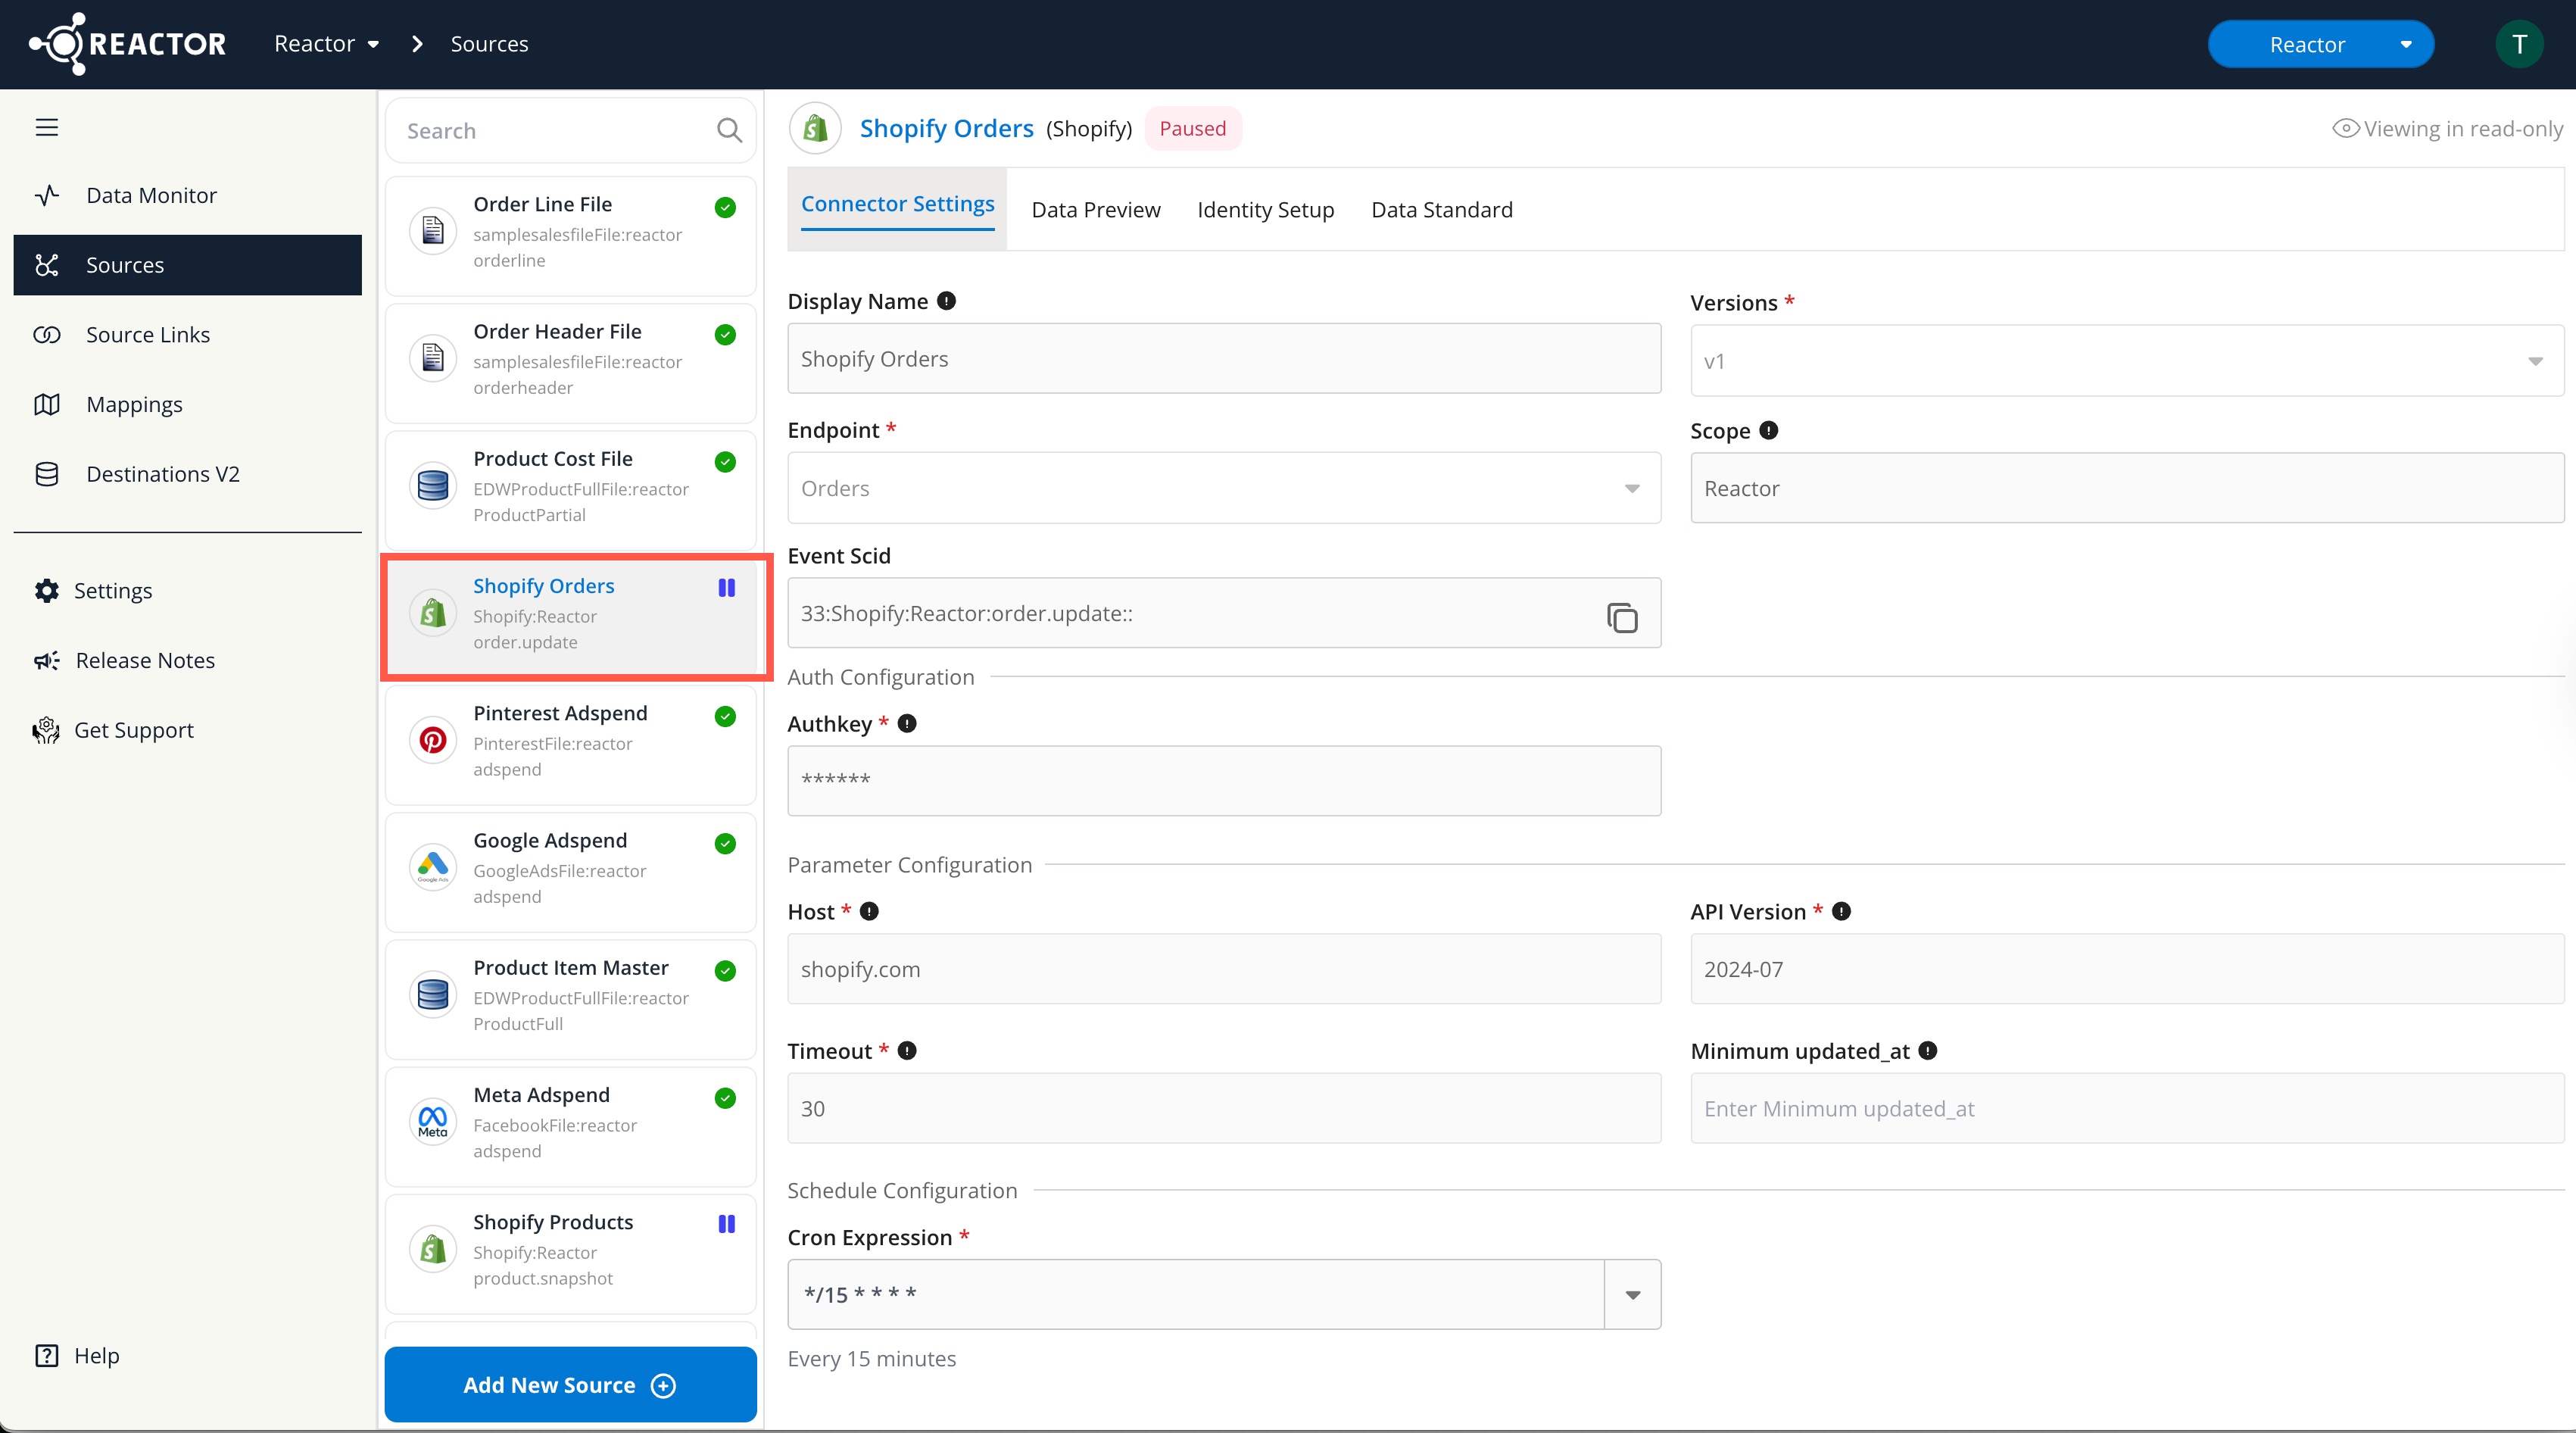
Select the Source:
- In the left sidebar, select the source for which you want to configure an Identity Setup.
-
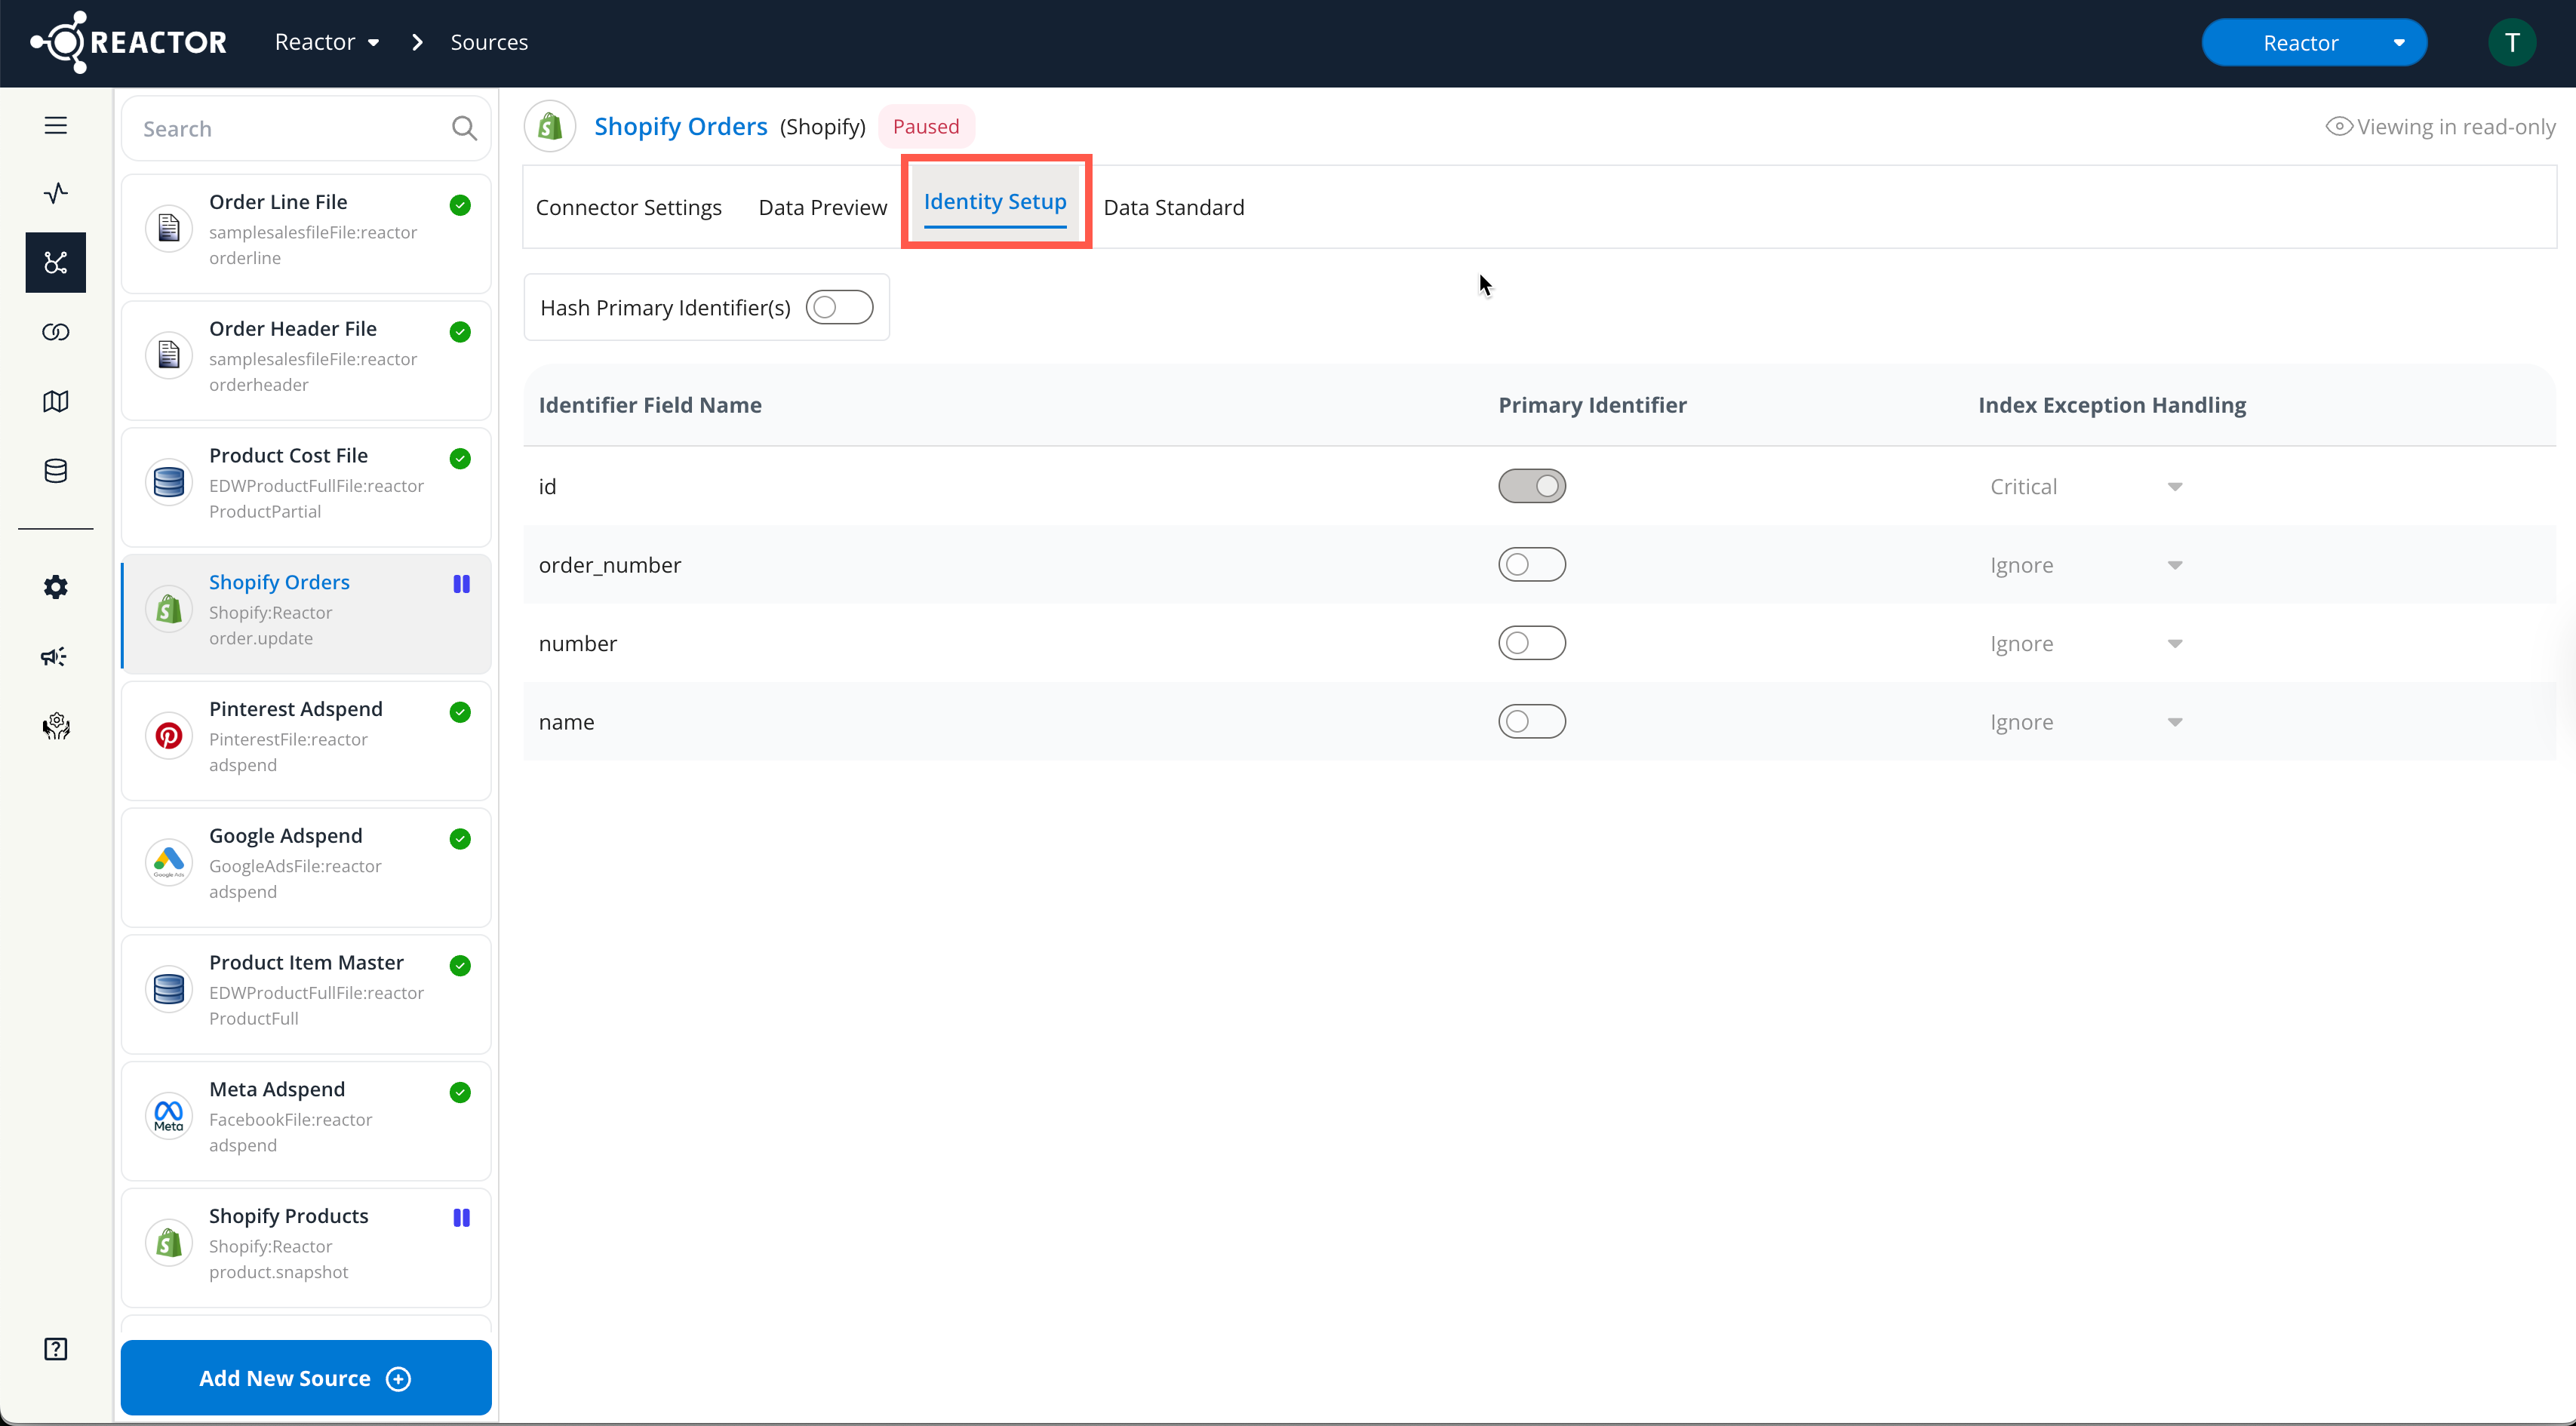
Go to the Identity Setup Tab:
- Select the "Identity Setup" tab.
-
Add an Identifier:
- Select the "+ Identifier" button to add a field to the Identity Setup.
An identifier field should meet one or more of the following criteria:
- It represents a primary key or a unique identifier for records in the data source (e.g., the
idfield in Shopify order records). - It is one of multiple fields that can be combined to form a unique identifier (similar to a "composite unique key" in SQL).
- It is used in a Source Link configuration. (See "How To Link Sources in Reactor" for details.)
- It can identify records but isn't necessarily the data source's primary key (e.g., the
order_numberfield in Shopify order records).
-
Choose the Identifier Field:
- A dropdown menu will appear. Select the desired field and click "Done." The field will be added to a table on the Identity Setup tab.
-
Repeat for All Identifiers:
- Repeat steps 4 and 5 until you have added all necessary identifiers.
-
Define Primary Identifier(s):
Designate primary identifiers by selecting the checkbox in the "Primary Identifier" column.
There are two ways to do this:
- Primary Key Available: If your data source has a primary key or globally unique identifier, select the checkbox for that field only.
- Composite Key: If no single primary key exists, but multiple fields can be combined to form a unique identifier, select the checkbox for each of those fields.
- Examples of data sources requiring composite keys:
- Pre-aggregated Adspend data (e.g., from Facebook Ads, Google Ads)
- A COGS file with
Order ID(ortransaction ID) andLine ID(oritem ID) - A Shipping cost file with
Order ID(ortransaction ID) andfulfillment ID(orshipment IDortracking number+carrier name/ID)
-
Configure Hashing (Optional):
- If any primary identifiers contain Personally Identifiable Information (PII) like names, email addresses, phone numbers, or street addresses, select the "Hash Primary Identifier(s)" checkbox.
- Important Note: If multiple "Primary identifier" checkboxes are selected, "Hash Primary Identifier(s)" is checked by default and cannot be unchecked.
-
Set Exception Handling (Optional):
- Primary identifiers default to "Critical" exception handling. This means that if a record is missing a primary identifier, it will not be indexed, and an Identity Index error will be reported.
- For non-primary identifiers, choose one of the following "Index Exception Handling" options:
- Critical: Missing fields cause an error, and the record is not indexed.
- Warning: Missing fields trigger a warning but the record is still indexed.
- Ignore: Missing fields are ignored, and no error messages are generated.
-
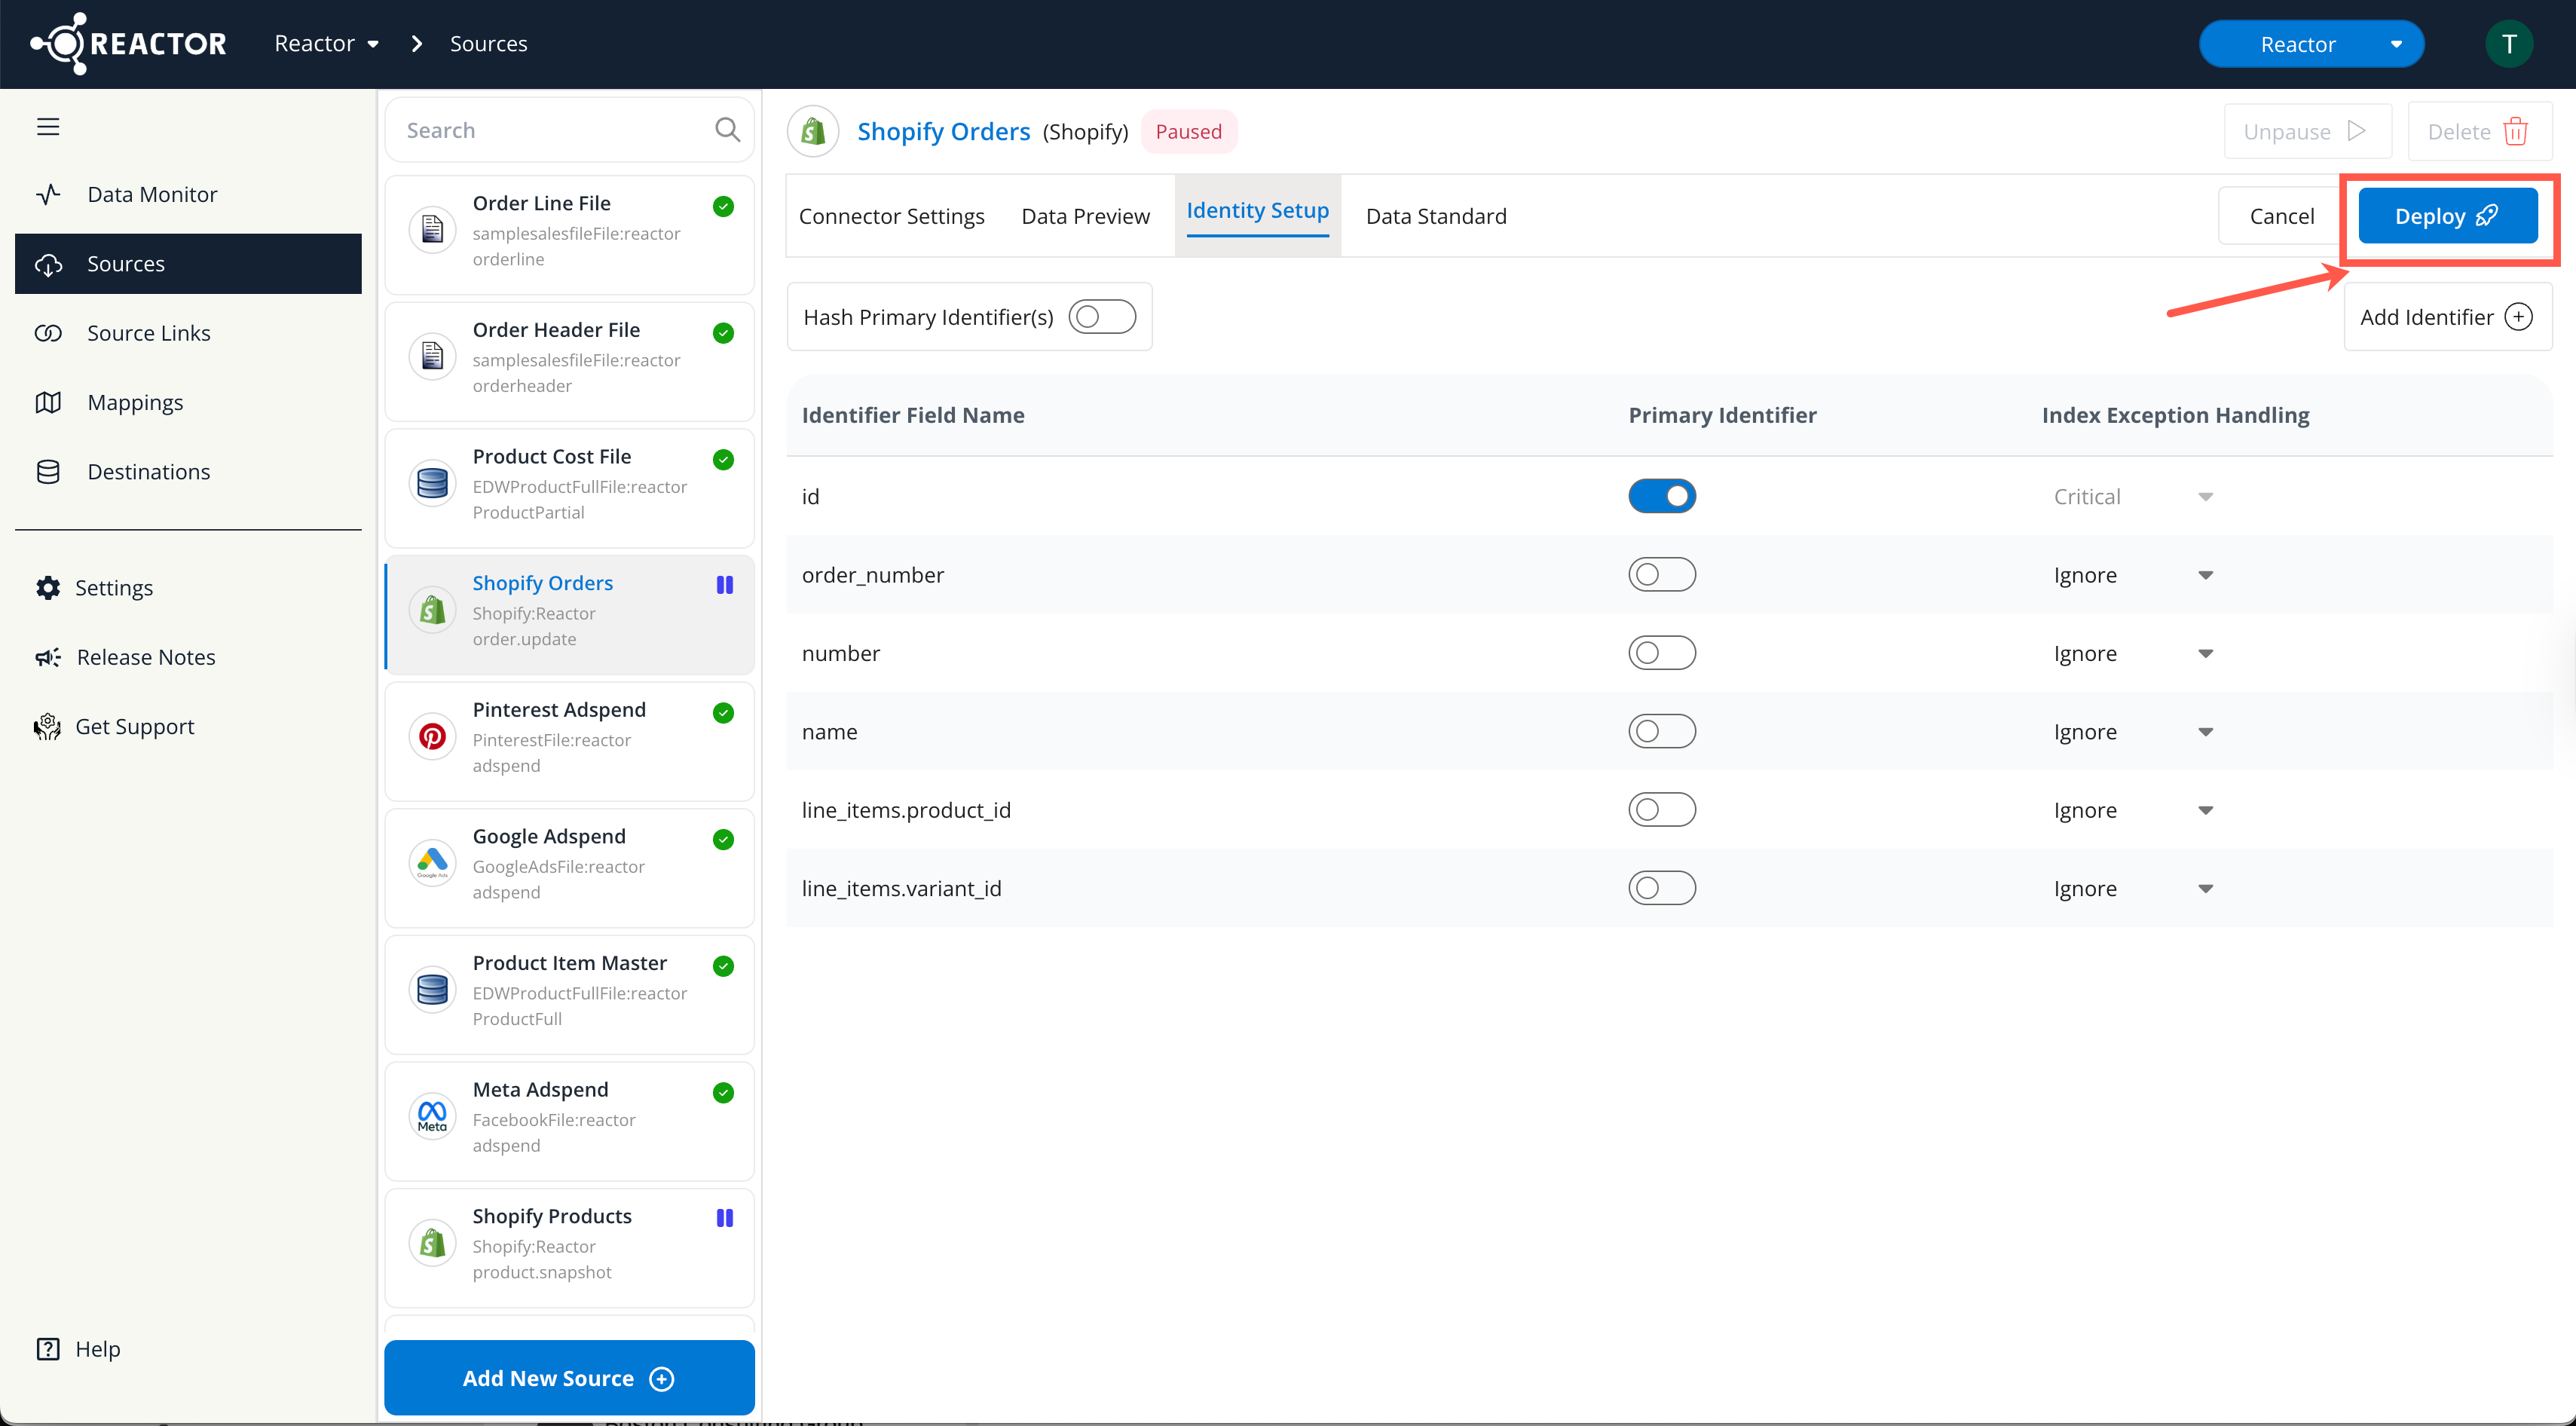
Deploy the Identity Setup:
- Once you have finished configuring the Identity Setup, click the "Deploy" button at the top of the screen.
After deployment, you can review the data source's schema for data type conflicts and optionally configure Data Standardization expressions. (See "How to Configure a Data Standard" for more information.)
How to Edit an Identity Setup and Reindex Source Data
When to Edit an Identity Setup
You might need to edit a source's Identity Setup in the following situations:
- The original setup did not correctly define the data source's primary identifier(s).
- You need to add one or more secondary identifiers to configure a Source Link with another data source.
In all cases, you can add or remove identifiers, redeploy the setup, and reindex the data.
Editing an Identity Setup
-
Navigate to the Sources Panel:
- In Reactor, use the left sidebar to select "Sources."
-
Select the Source:
- In the left sidebar, select the source you wish to modify.
-
Go to the Identity Setup Tab:
- Select the "Identity Setup" tab to view the current configuration.
- Select the "Identity Setup" tab to view the current configuration.
-
Add a Field:
- Click the "+ Identifier" button.
- Select the field from the dropdown menu and click "Done." The field will be added to the table.
- Repeat as needed.
-
Designate Primary Identifiers:
- If any newly added fields should be primary identifiers, select the checkbox in the "Primary Identifier" column.
-
Remove a Field:
- To remove a field, click the "wastebasket" icon (🗑️) next to the field.
-
Set Exception Handling:
- For non-primary identifiers, select the appropriate "Index Exception Handling" option:
- Critical: Missing fields cause an error, and the record is not indexed.
- Warning: Missing fields trigger a warning but the record is still indexed.
- Ignore: Missing fields are ignored, and no error messages are generated.
- For non-primary identifiers, select the appropriate "Index Exception Handling" option:
-
Deploy the Updated Setup:
- Click the "Deploy" button at the top of the screen to deploy the changes.
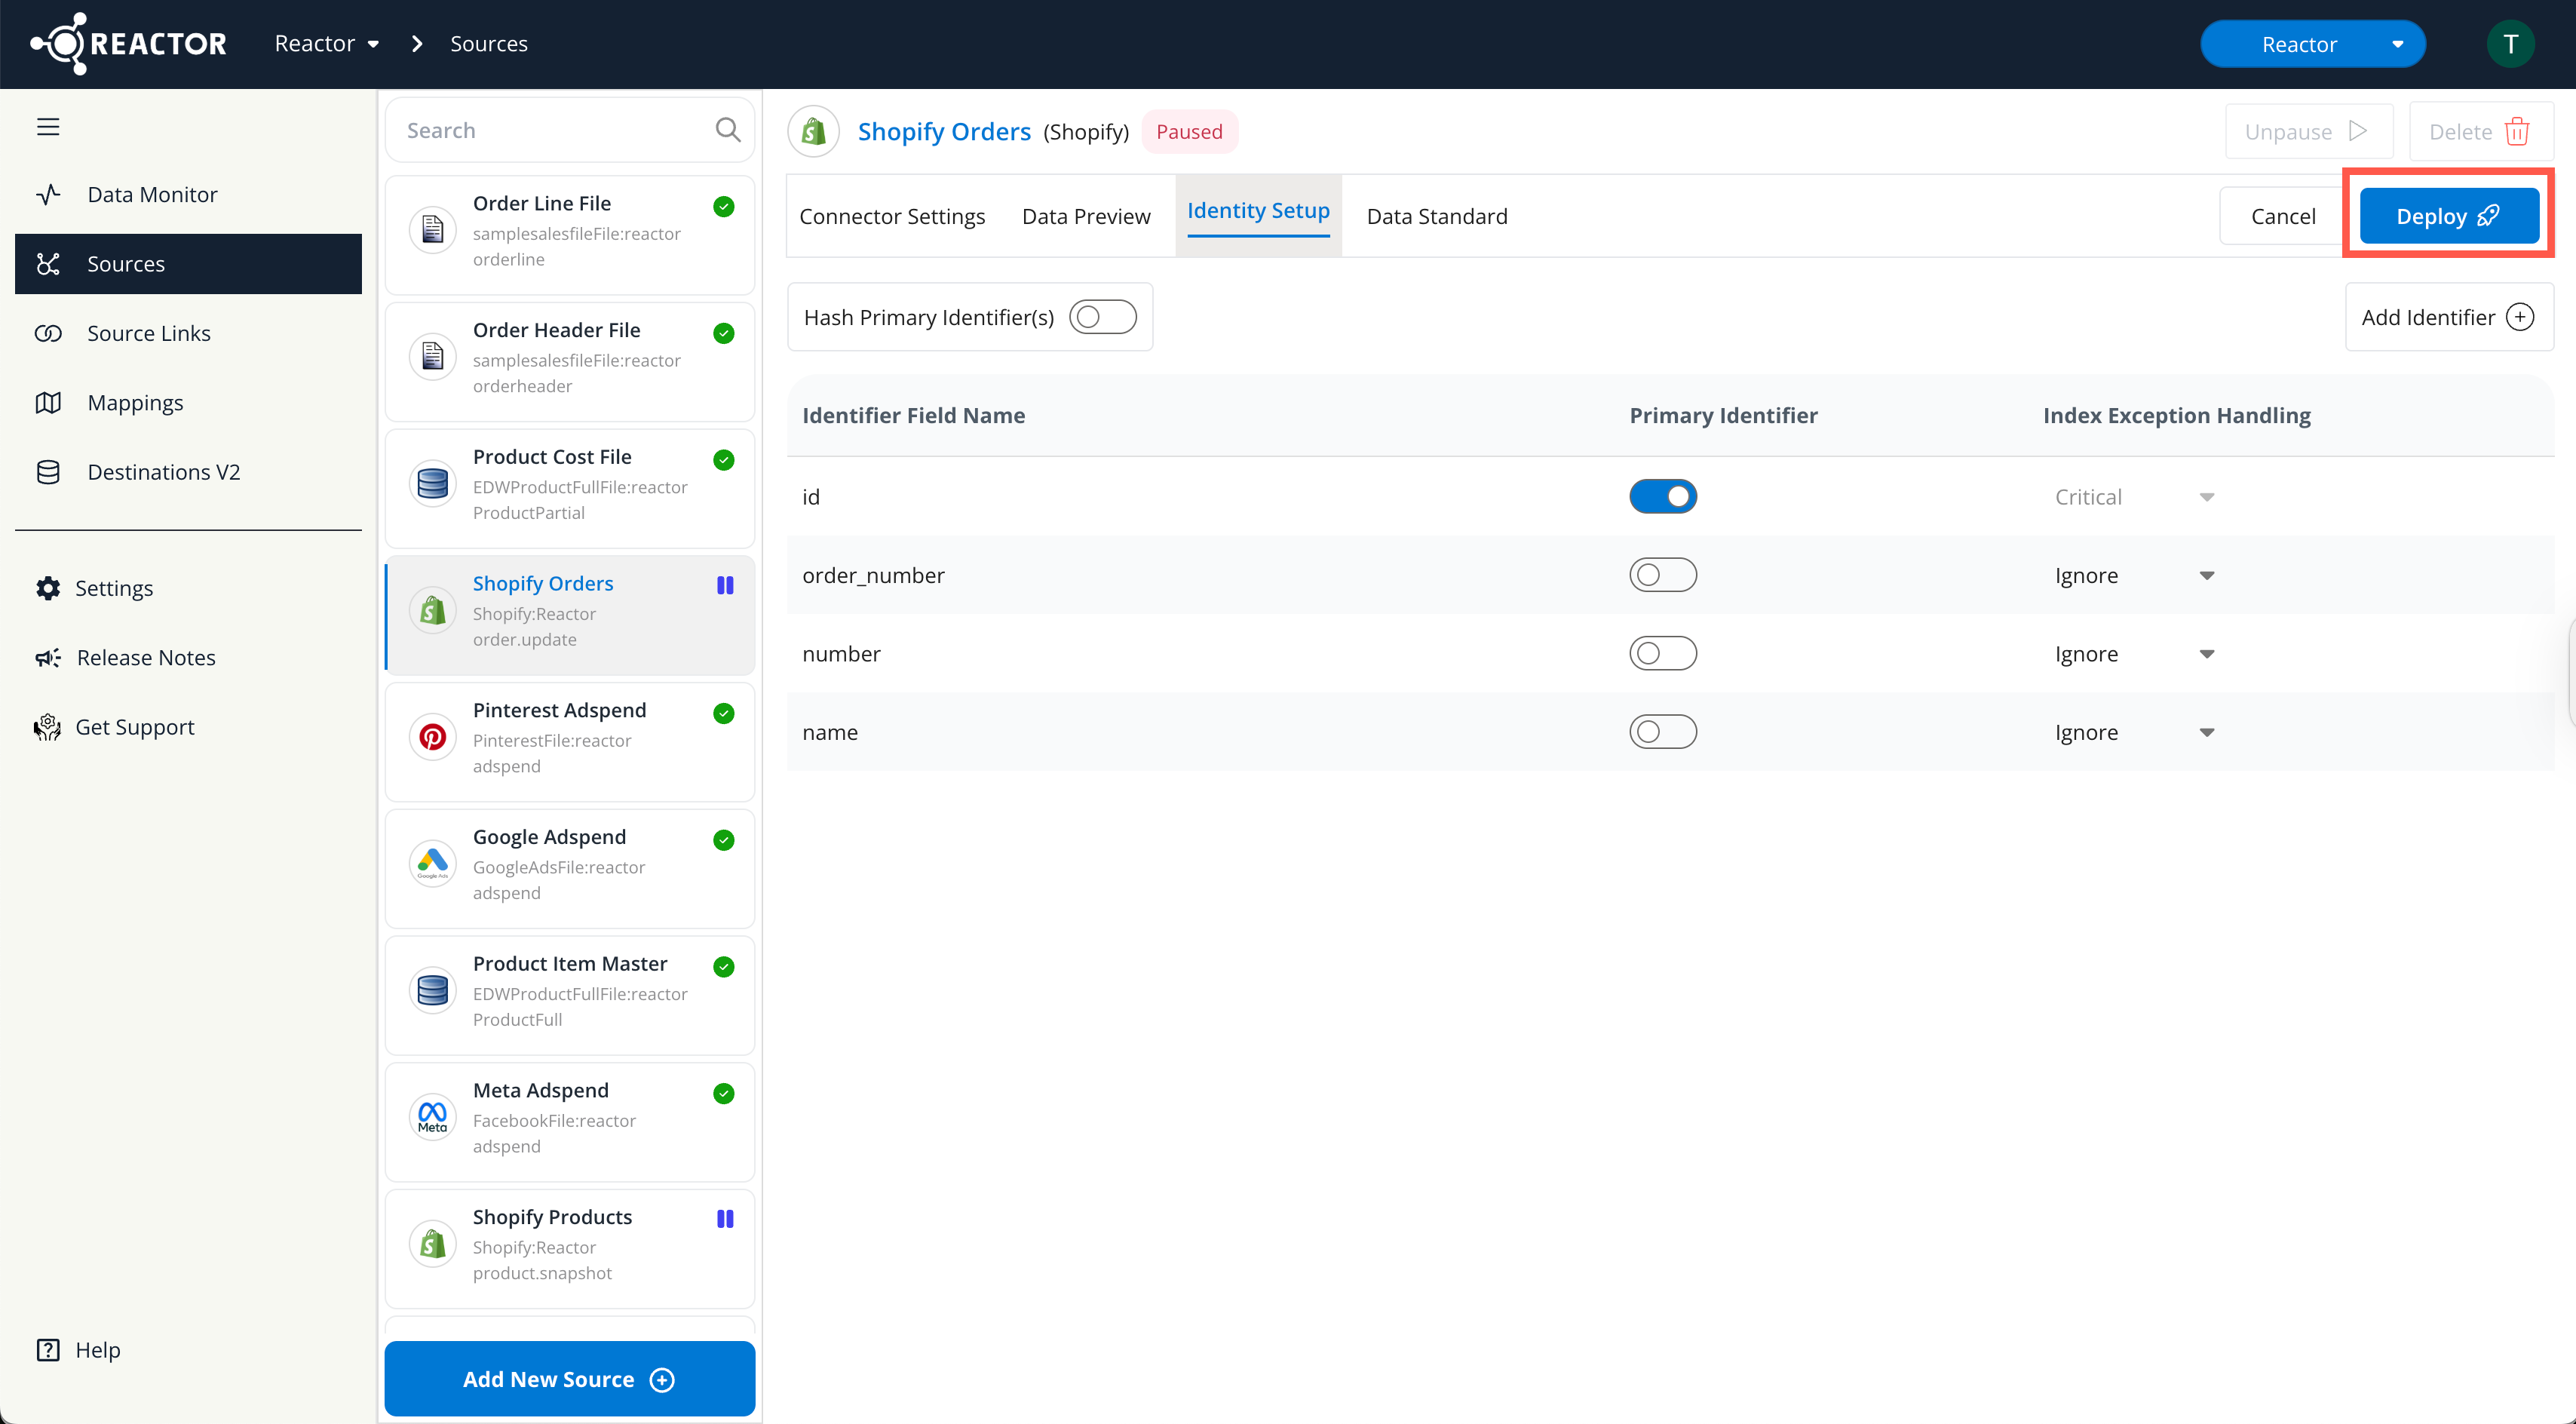
- Note: For assistance with updating a data source's Identity Setup, please contact support.
Reindexing Source Data
After deploying an updated Identity Setup, Reactor automatically reindexes all data from the source. This process typically takes a few minutes.
If you did not change the primary identifier(s), no further action is required.
⚠️ Important: If you did change the primary identifier(s), you may need to delete data from your data destination(s).
Changing primary identifiers alters the
input_scid(a Reactor metafield), which may be used as a primary key in data warehouses like Google BigQuery or Snowflake.This change can cause duplication issues in downstream views that deduplicate records based on
input_scid.To prevent duplication, truncate or delete records in the landing table that were output before the Identity Setup update. Refer to your data warehouse documentation for specific instructions.
After deleting the old data, you must run a mapper replay to re-transform and output the reindexed data to its destination(s).
For more information on re-transforming data, see the "Retransforming Data and Mapper Replay" documentation.
What's Next?
After deploying the Identity Setup, you can proceed to any of the following steps:
- Define data cleansing, standardization, and PII masking rules. (See Standardize Your Source Data for more information.)
- Link this data source to another source in Reactor. (See How to Link Sources for more information.)
- Or, if linking or data standardization are not needed, you can map your source data. (See our Mapping documentation for more information.)